Dataverse: Autogenerating populated document templates
These instructions assume that you already have an Excel or Word template created for your solution. These examples can be used to auto‑generate a filled template as part of an existing process, such as sending a confirmation document upon submission. I've added a few extra steps into the flow information to allow for dynamically grabbing the environment URLs, but there are other ways to accomplish these as well.
Get Template Information | Word Templates | Excel Templates
Assumptions / Prerequisites
- Dataverse-based solution
- A service principal is required
- Templates must be created and uploaded not in the personal scope
- Notes and attachments must be enabled for the Dataverse table
Get Template Information
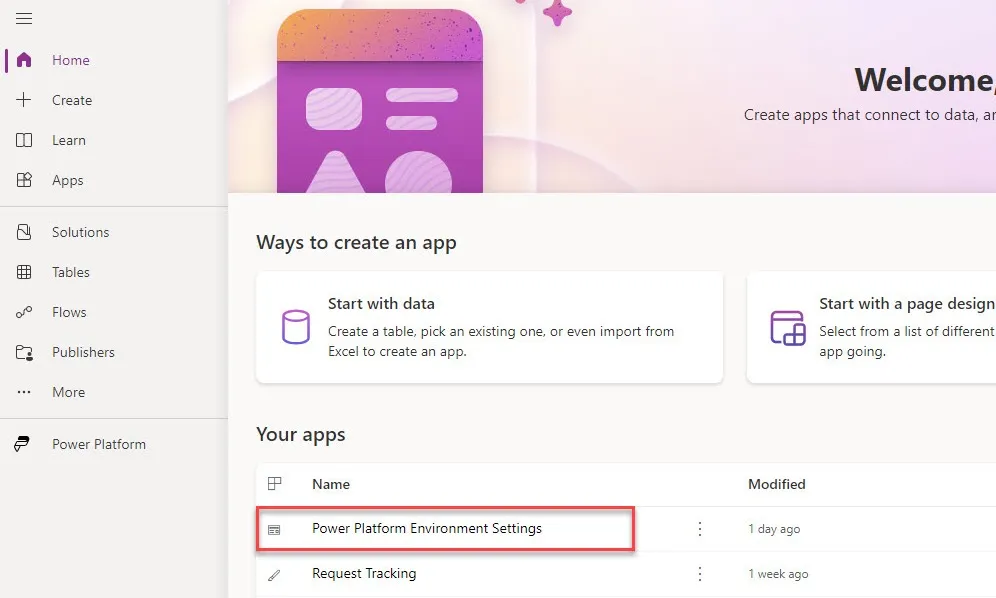
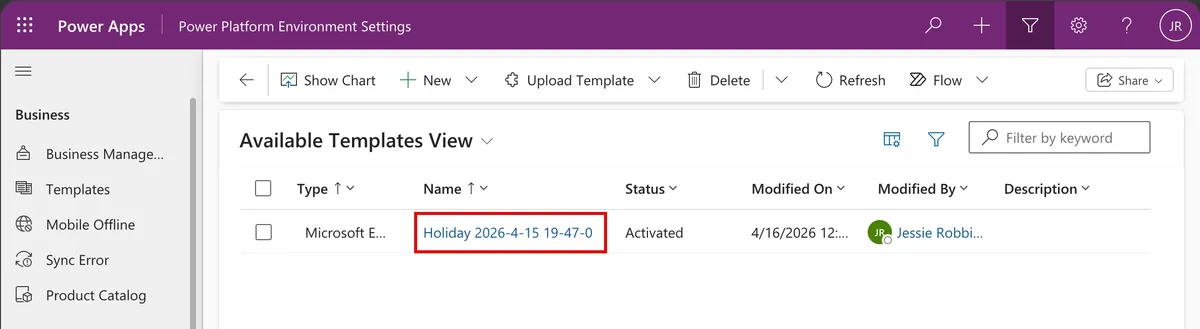
Go to the environment where your solution exists and open the Maker Portal home page.
Launch the Power Platform Environment Settings app.
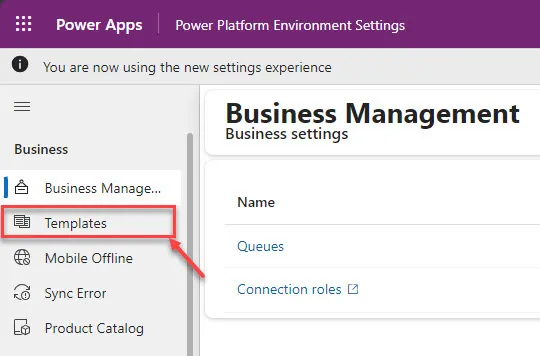
In the left navigation, select Templates.
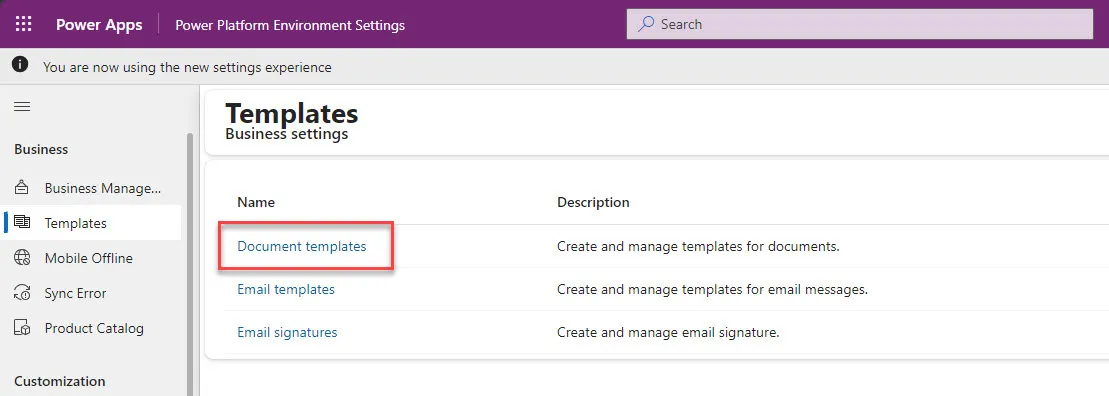
Select Document templates.
Select your template name to open its form.
Copy the full URL from the address bar.
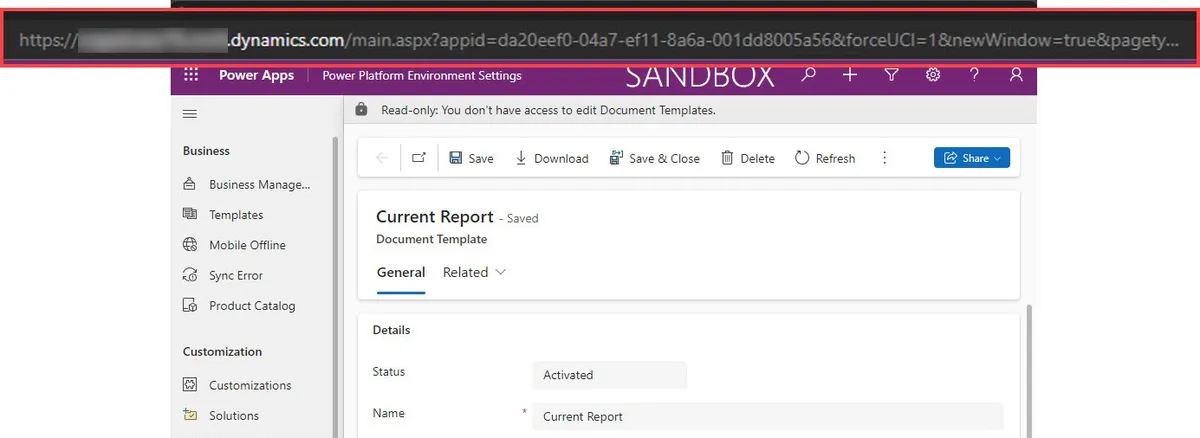
Store this URL—you will need the GUID after id= for your flow.

Word Templates
Word templates operate on a single Dataverse item. The following example automatically generates a confirmation document when an item is approved and uploads that document to the timeline.
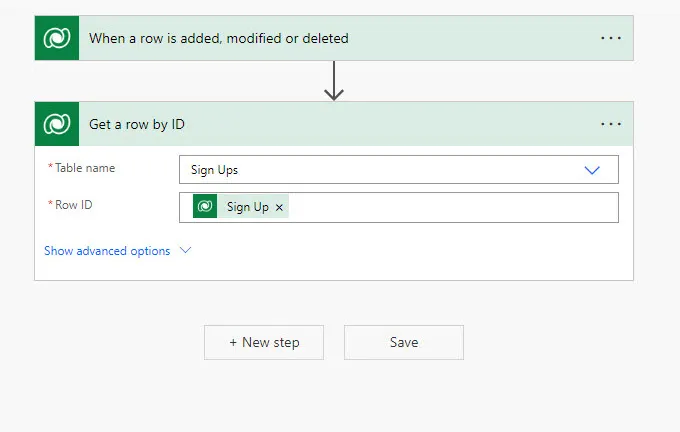
This flow is being triggered by a change to a Dataverse table - it is one of many options for triggering this kind of process.

Get the Dataverse row by ID. This allows retrieving the environment URL dynamically rather than hard coding it into a flow.
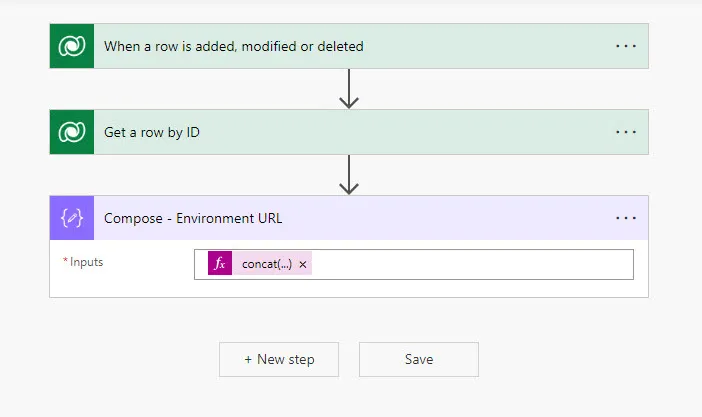
Add a Compose action with the expression:
concat('https://', uriHost(body('Get_a_row_by_ID')?['@odata.context']))
uriHost returns the portion of the URL between https:// and the first /.
Example: https://www.google.com/ → www.google.com
Retrieve your template's entity code
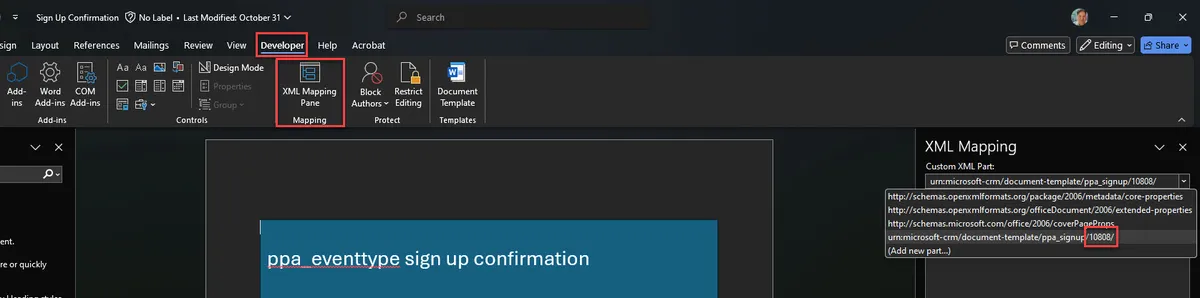
- Open the Word Template → Developer tab → XML Mapping Pane
- Find your entity in the dropdown
- Note the number at the end (your entity code)
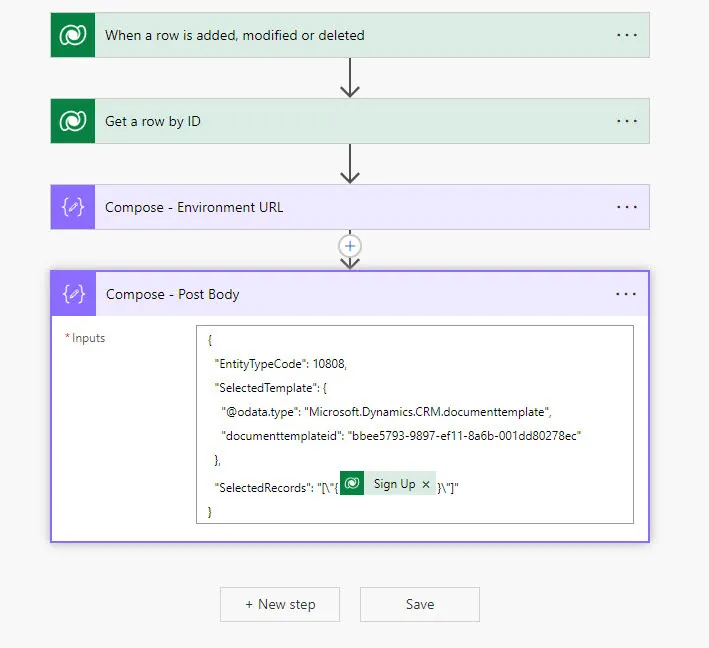
Add another compose action to capture the information that will be sent to generate the populated word template.
Use the following structure, replacing the appropriate selections. Do not add or remove any additional punctuation.
{
 "EntityTypeCode": REPLACE_WITH_ENTITY_CODE_NUMBER,
 "SelectedTemplate": {
   "@@odata.type": "Microsoft.Dynamics.CRM.documenttemplate",
   "documenttemplateid": "REPLACE_WITH_TEMPLATE_GUID"
 },
 "SelectedRecords": "[\"{REPLACE_WITH_ITEM_GUID}\"]"
}
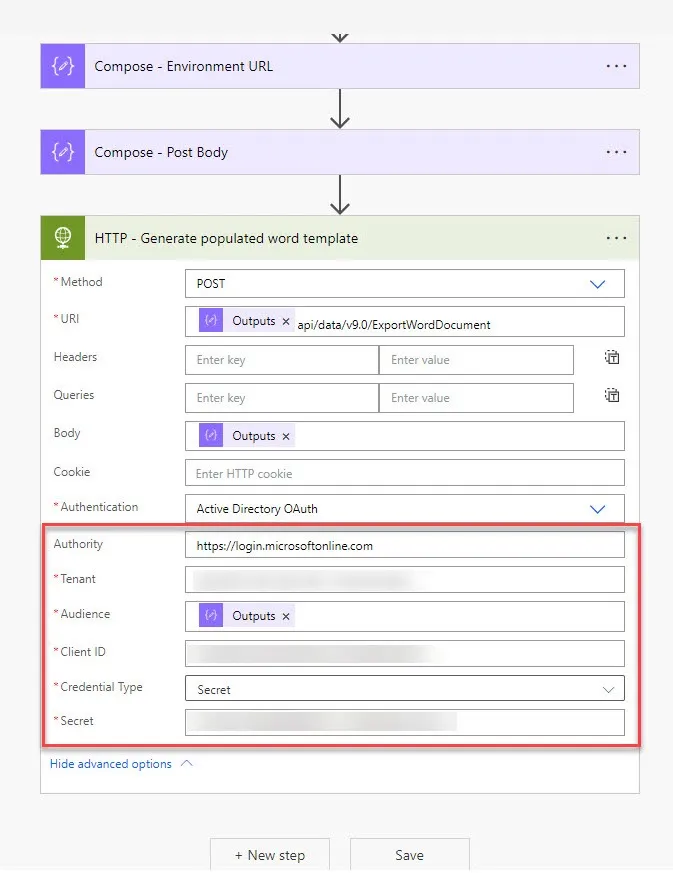
Add an HTTP action (Premium connector) with the following settings:
- Method: POST
- URI:
/api/data/v9.0/ExportWordDocument - Body: Output of the Compose action containing the template information
- Expand Advanced options → Authentication: Active Directory OAuth
- Authority: https://login.microsoftonline.com (https://login.microsoftonline.us for GCC-High and DoD)
- Tenant: Your tenant's ID
- Audience: Environment URL
- Client ID / Secret: From your app registration
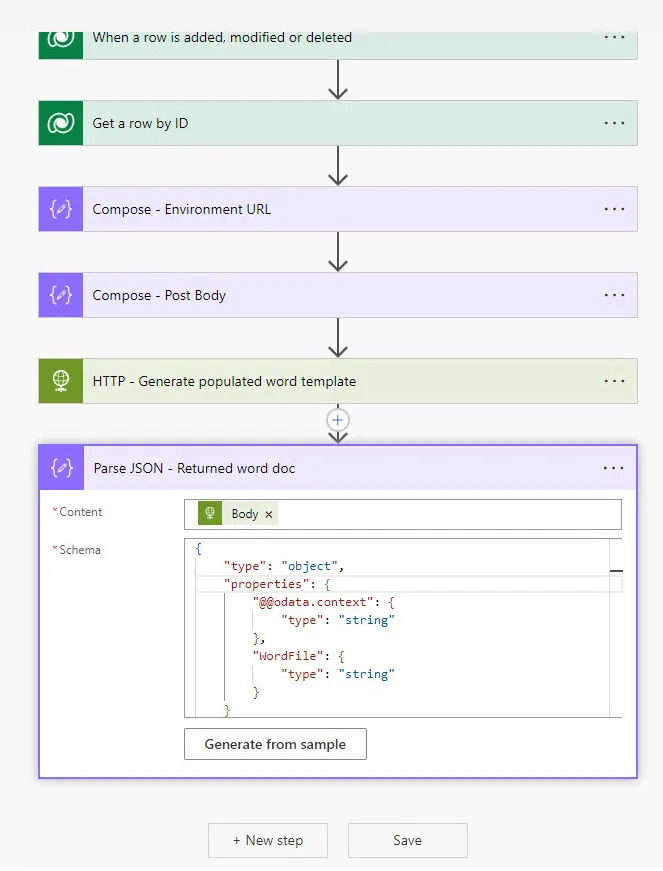
Add a Parse JSON action for the Body of the HTTP call. Use the following schema:
{
  "type": "object",
  "properties": {
    "@@odata.context": { "type": "string" },
    "WordFile": { "type": "string" }
  }
}
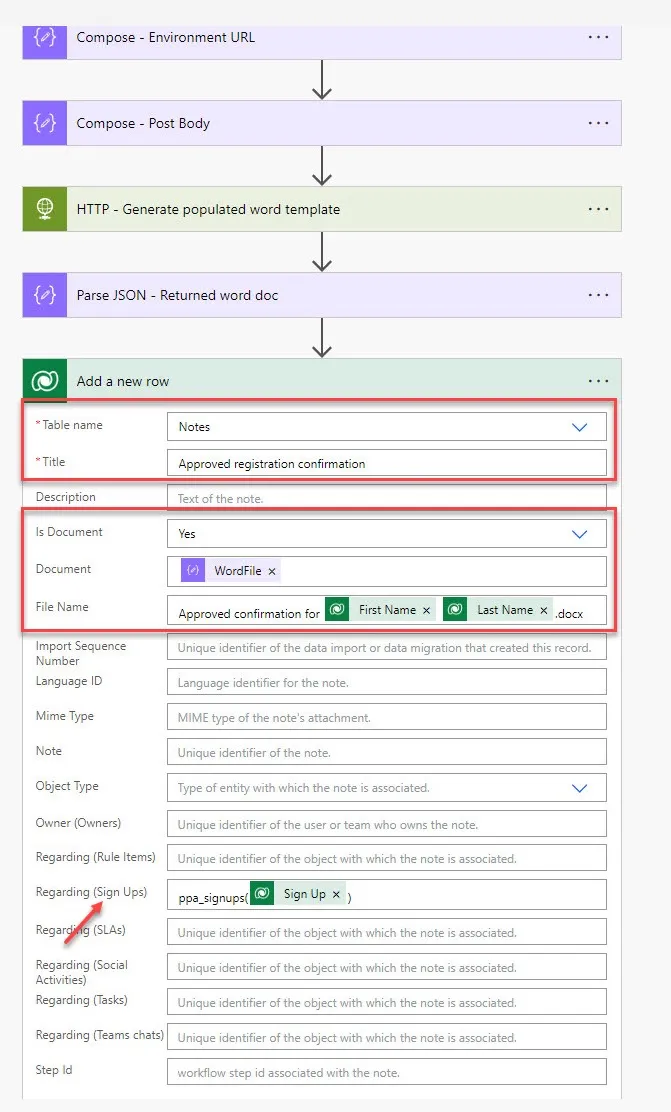
Create a new Notes table row to upload the file with the following required information:
- Title: The title that will show up on the Note itself
- Is Document: Yes
- Document: WordFile dynamic content from Parse JSON action
- File Name: File name of the document, must end in .docx
Scroll through the list of Regarding columns, looking for the one that applies to the table your template is based off of.
Add a reference to the item so it will show up in that items' timeline control.
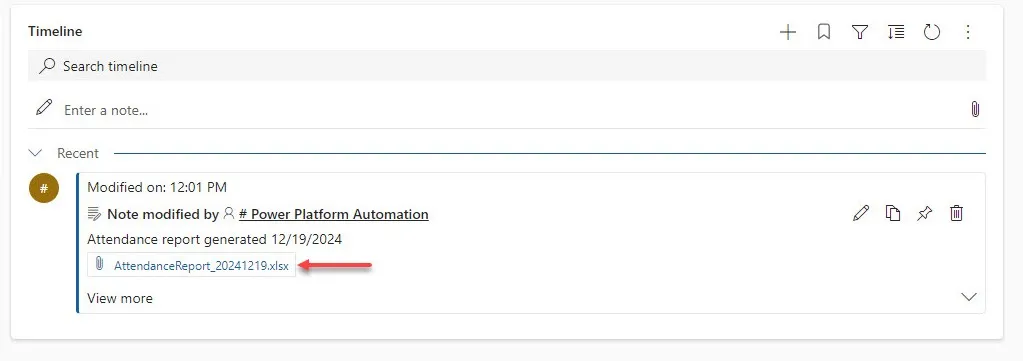
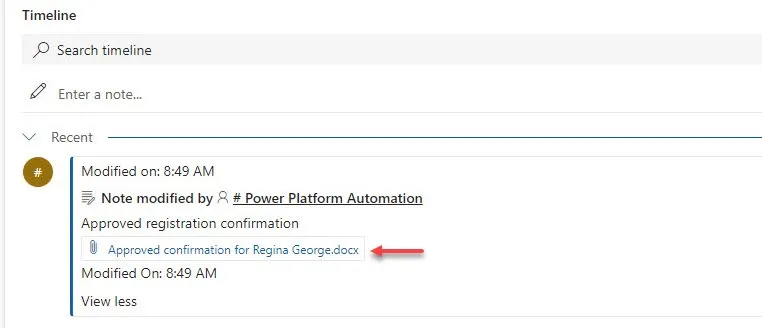
When successful you should see an entry in the timeline control with the attachment and any additional content you provided when creating the new row.
Excel Templates
Excel templates operate off a list of Dataverse items. The steps below show using a Excel template to generate an attendance report, but can be leveraged many different ways.
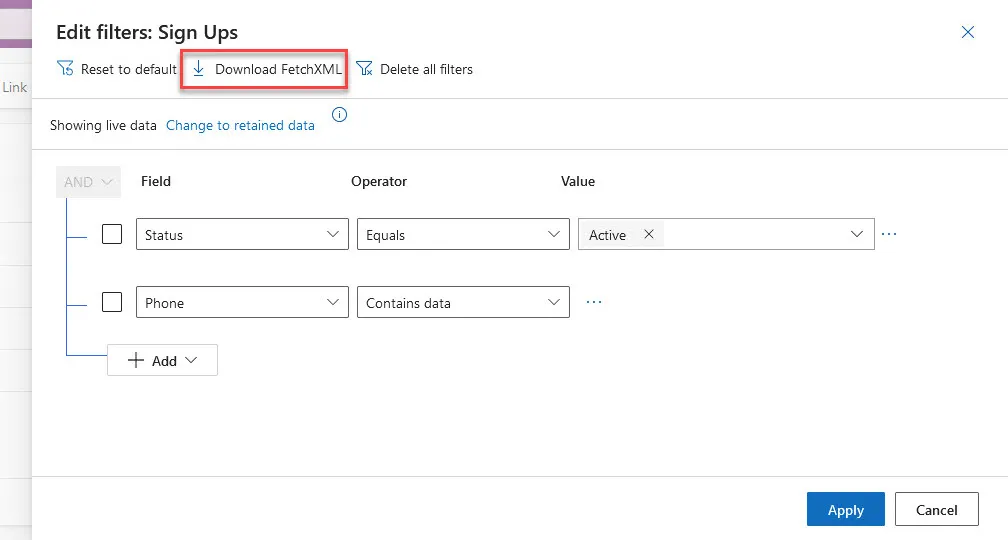
Start by creating a view or going to an existing view that contains the items you want in the report in the model-driven app.
Select Edit filters.

Select the Download FetchXML button which will download an XML file to your browser's download location.
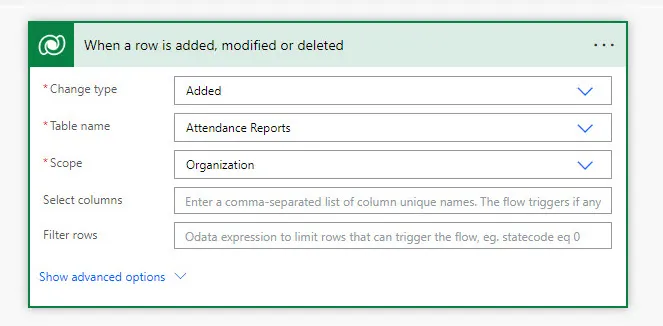
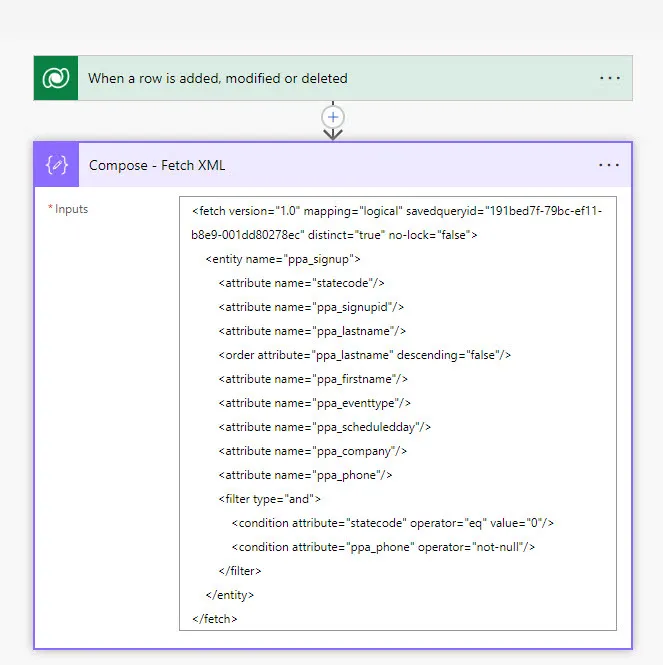
This flow is going to be triggered by an item being added to a reports table, this is only one example of how you could do this.
Add a compose action and paste the content of the Fetch XML file downloaded prior.
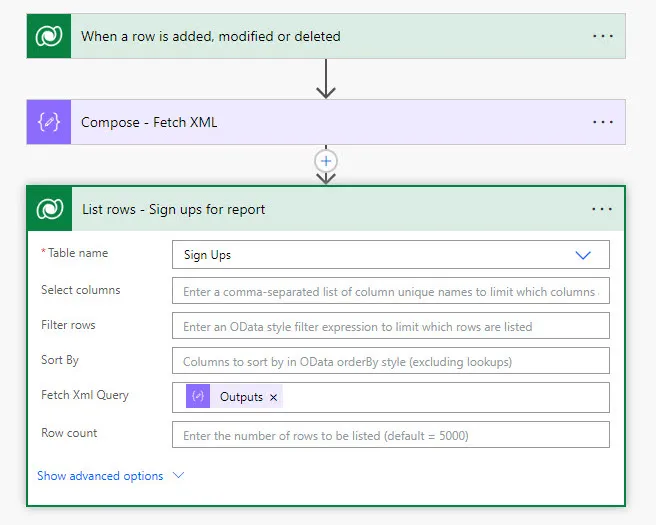
Create an action to get the items in the report. This is necessary to be able to get the environment URL dynamically rather than hard coding it into a flow.
Because we have the Fetch Xml query, we're going to populate that into action, rather than directly adding filter statements.
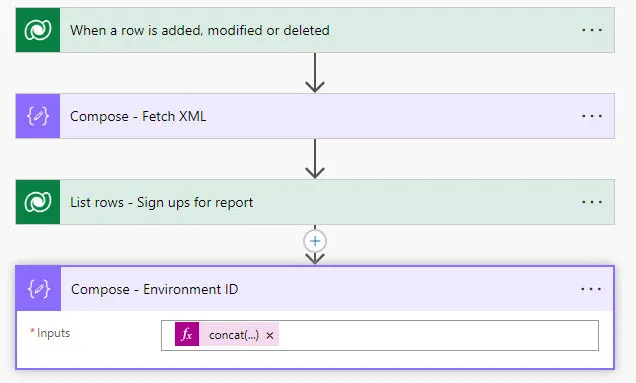
Add a compose action to capture the current environment's URL using the following expression:
concat('https://', uriHost(body('List_rows_-_Sign_ups_for_report')?['@odata.context']))
uriHost returns the portion of the URL between https:// and the first /.
Example: https://www.google.com/ → www.google.com
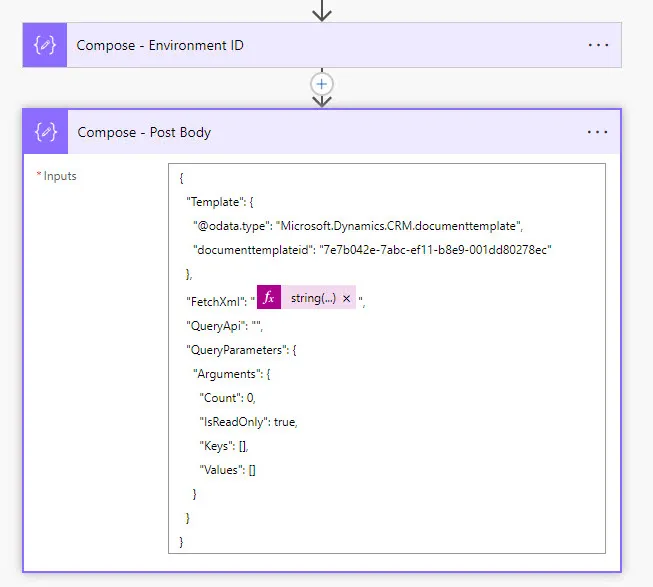
Add another compose action to capture the information that will be sent to generate the populated Excel template.
Use the following structure, replacing the appropriate selections. Do not add or remove any additional punctuation.
{
 "Template": {
   "@odata.type": "Microsoft.Dynamics.CRM.documenttemplate",
   "documenttemplateid": "REPLACE-WITH-TEMPLATE-GUID"
 },
 "FetchXml": "REPLACE-WITH-FETCHXML-REFERENCE",
 "QueryApi": "",
 "QueryParameters": {
   "Arguments": {
     "Count": 0,
     "IsReadOnly": true,
     "Keys": [],
     "Values": []
    }
  }
}
IMPORTANT: You must wrap the Fetch XML outputs in a string() expression for it to be properly formatted
Add an HTTP action (Premium connector) with the following settings:
- Method: POST
- URI:
/api/data/v9.0/RenderTemplate - Body: Output of the Compose action containing the template information
- Expand Advanced options → Authentication: Active Directory OAuth
- Authority: https://login.microsoftonline.com (https://login.microsoftonline.us for GCC-High and DoD)
- Tenant: Your tenant's ID
- Audience: Environment URL
- Client ID / Secret: From your app registration

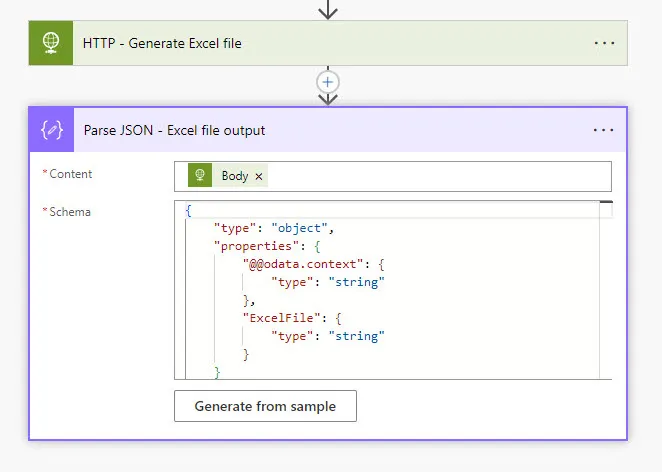
Add a Parse JSON action for the Body of the HTTP call. Use the following schema:
{
   "type": "object",
   "properties": {
       "@@odata.context": {
           "type": "string"
       },
       "ExcelFile": {
           "type": "string"
       }
   }
}
Create a new Notes table row to upload the file with the following required information:
- Title: The title that will show up on the Note itself
- Is Document: Yes
- Document: ExcelFile dynamic content from Parse JSON action
- File Name: File name of the document, must end in .xlsx
Scroll through the list of Regarding columns, looking for the one that applies to the table your template is based off of.
Add a reference to the item so it will show up in that items' timeline control.
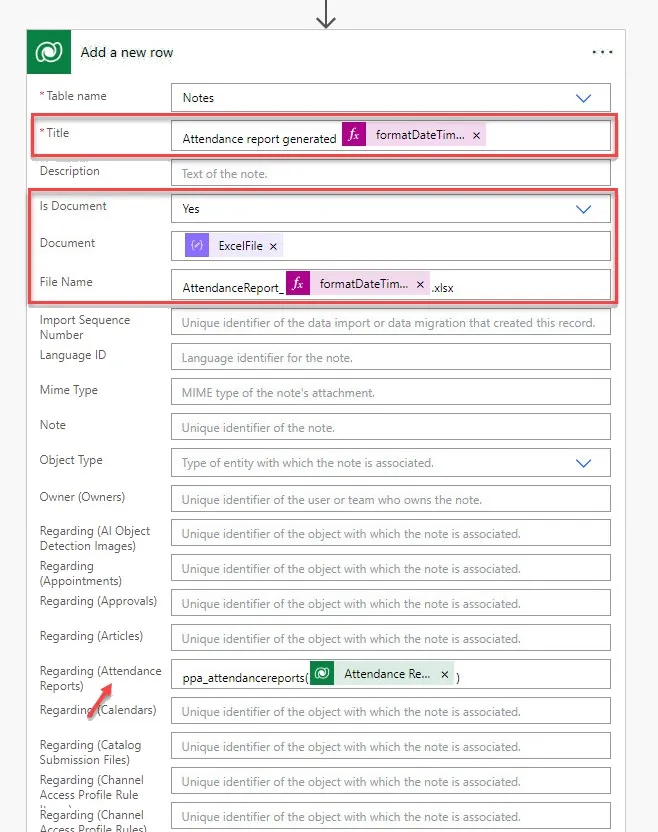
When successful you should see an entry in the timeline control with the attachment and any additional content you provided when creating the new row.